

How to Add WebMCP to a Website: Chrome 149 Forms, Tool Schemas, and registerTool
Add WebMCP to a website with Chrome 149 declarative forms or document.modelContext.registerTool, then validate schemas, permissions, Lighthouse results, evals, and telemetry.
Evidence 5 cited sources
On this page
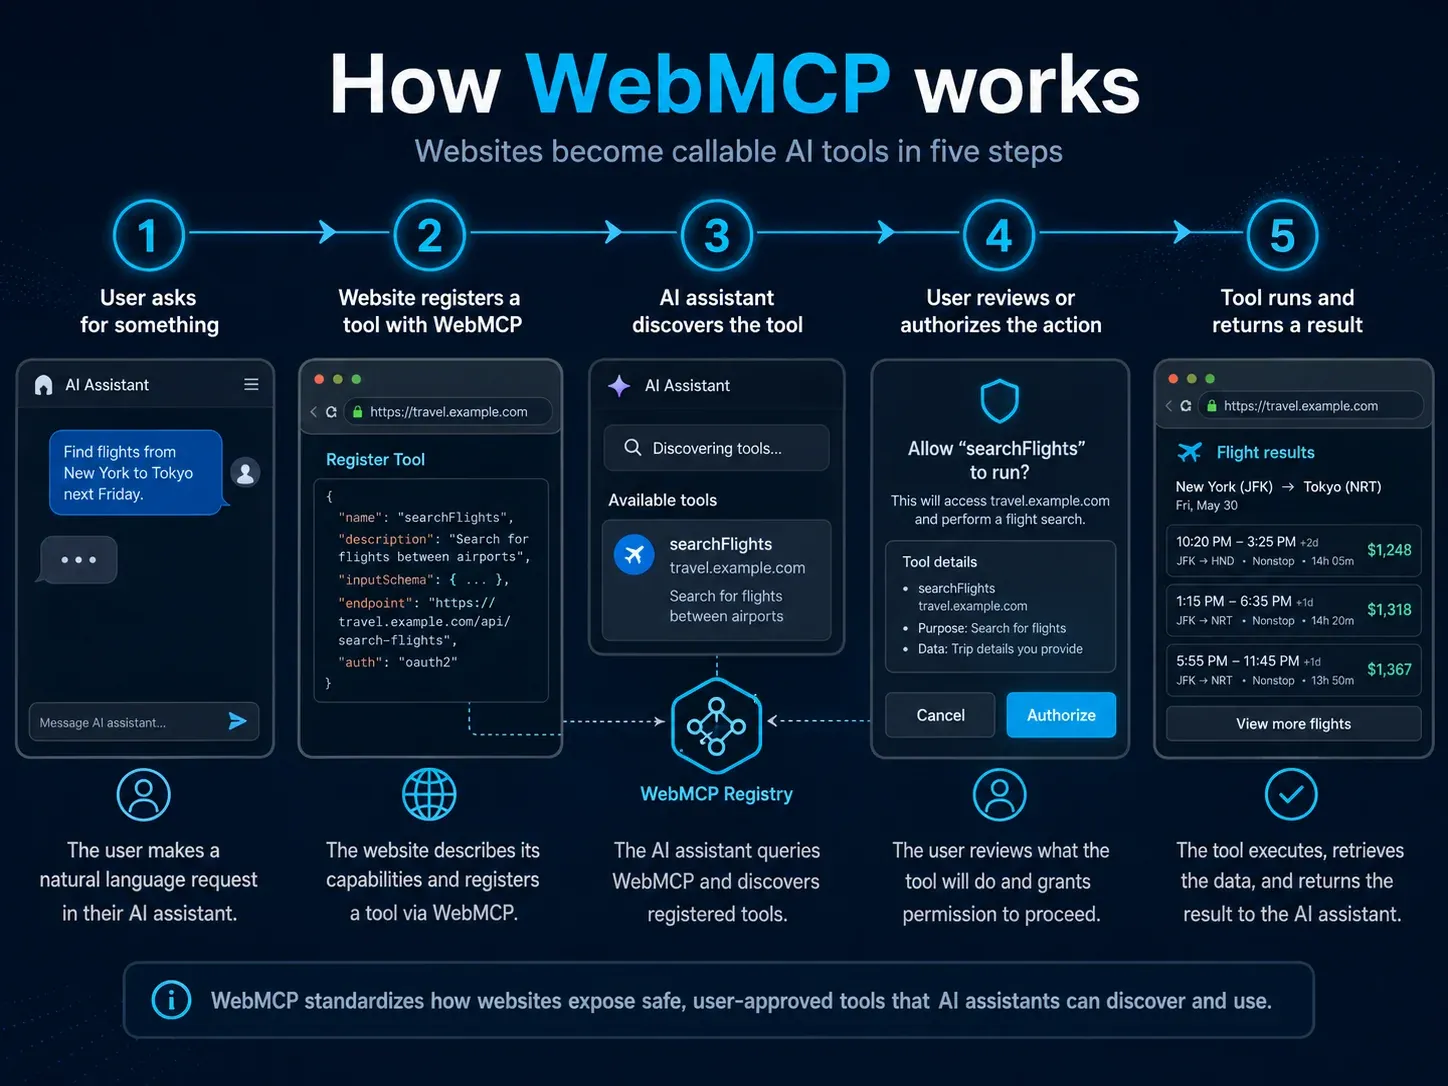
If an older tutorial tells you to use navigator.webmcp, dump the entire page state into an agent, or treat WebMCP as a magical “AI clicks the website” layer, do not copy it blindly. In the current 2026 documentation, the model is clearer: the site explicitly registers structured tools, and an agent understands them through stable names, descriptions and input schemas.
Chrome 149 provides a WebMCP origin trial. On August 26, Chrome also published a new design guide that starts from user goals, state transitions and conversational paths instead of telling developers to convert every button into a tool.
The simplest path: expose an existing form
If the task is already a form submission—search, filtering, booking, lookup or another explicit request—the declarative API is a good starting point:
<form
  toolname="search_docs"
  tooldescription="Search XBSTACK technical documentation"
  action="/search"
>
  <input
    name="q"
    toolparamdescription="Technical topic or error message"
  />
  <button type="submit">Search</button>
</form>
The page still works like a normal form for people, while an agent gets a task name and parameter meaning. This is most useful when the user-visible UI already represents a coherent task.
Richer actions: document.modelContext.registerTool
For tasks that depend on client state, custom validation or non-trivial execution, the current imperative API uses document.modelContext.registerTool:
await document.modelContext.registerTool({
  name: 'inspect_agent_readiness',
  description: 'Inspect the current site for agent-readiness signals.',
  inputSchema: {
    type: 'object',
    properties: {
      url: { type: 'string', format: 'uri' }
    },
    required: ['url']
  },
  annotations: {
    readOnlyHint: true
  },
  execute: async ({ url }) => {
    return await inspectReadiness(url)
  }
})
The important part is the contract, not the syntax. The name should be stable and action-oriented. The description should explain when the tool is useful. The schema should constrain what the agent can submit. A mutating action must not be mislabeled as read-only.
Do not register every button
Chrome’s August 26 guidance is useful here: start with a user goal, document the starting state and completion state, then identify meaningful state transitions.
On a commerce page, opening a details panel or switching tabs may be UI mechanics. Checking inventory, adding an item to a cart and placing an order are actual user tasks. Turning every DOM interaction into a tool creates a noisy tool catalog and makes selection harder.
A good WebMCP tool should map to a user task, not a CSS selector.
Security still belongs to your application
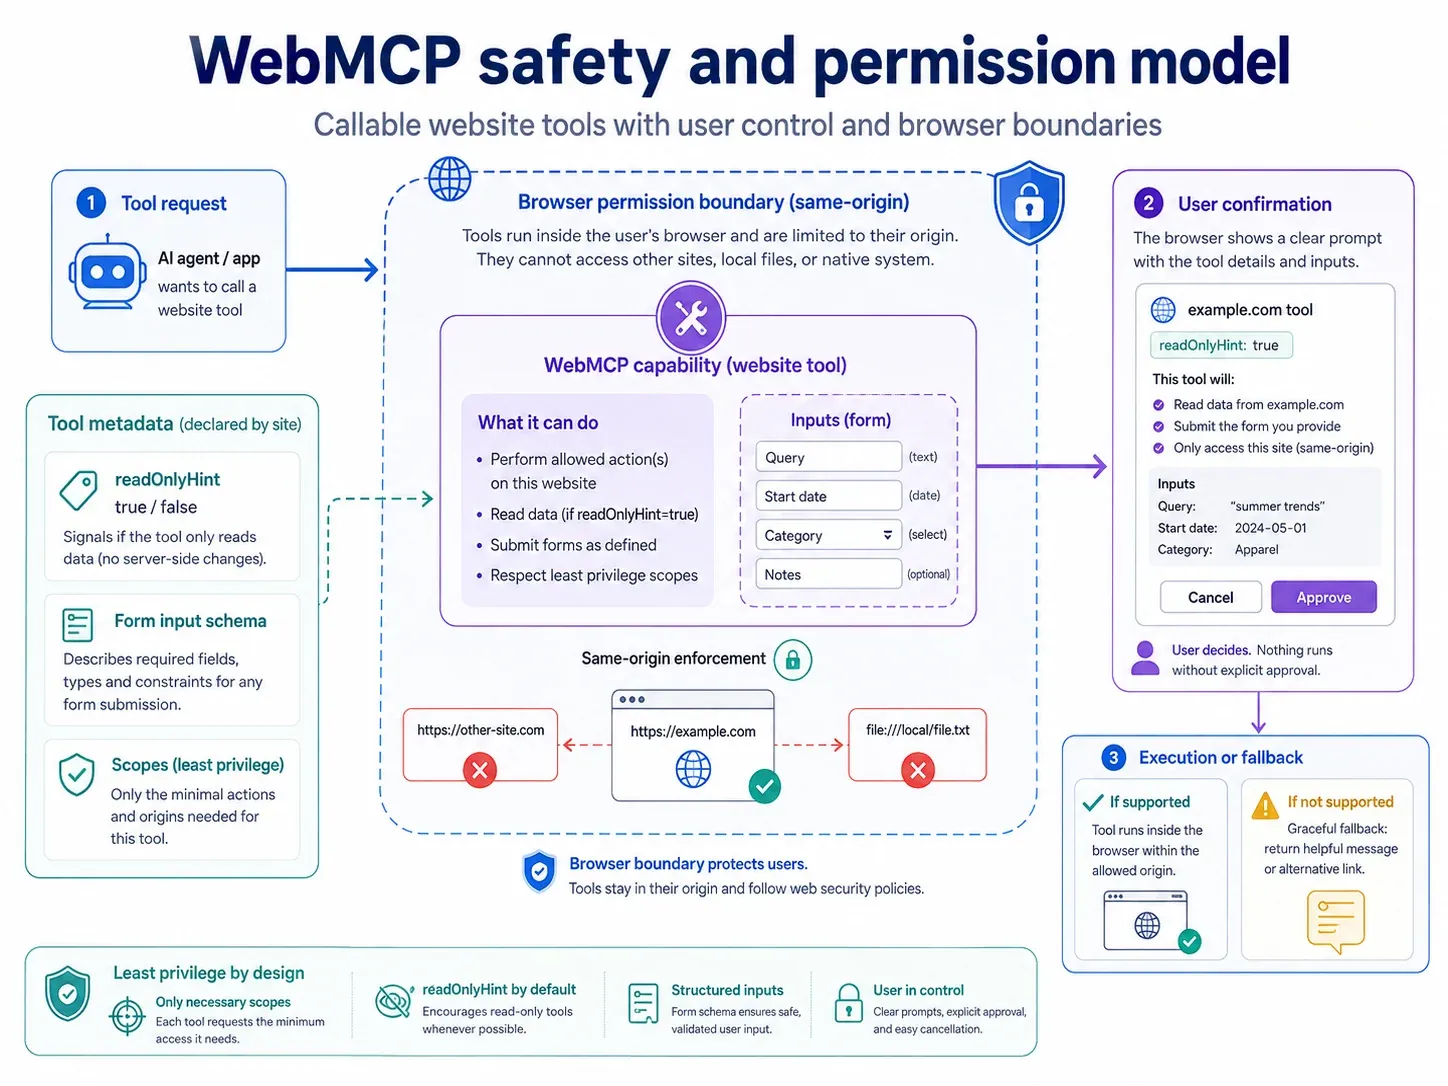
WebMCP exposes only the tools you register, but that does not replace authorization. Current Chrome security guidance recommends annotating genuinely read-only tools and constraining cross-origin exposure to trusted origins.
Deletion, payment, publishing, permission changes and other sensitive operations should still require server-side authorization, parameter validation, confirmations where appropriate, and audit records. The caller being an agent is not a reason to bypass the application’s existing security model.
How to verify the integration
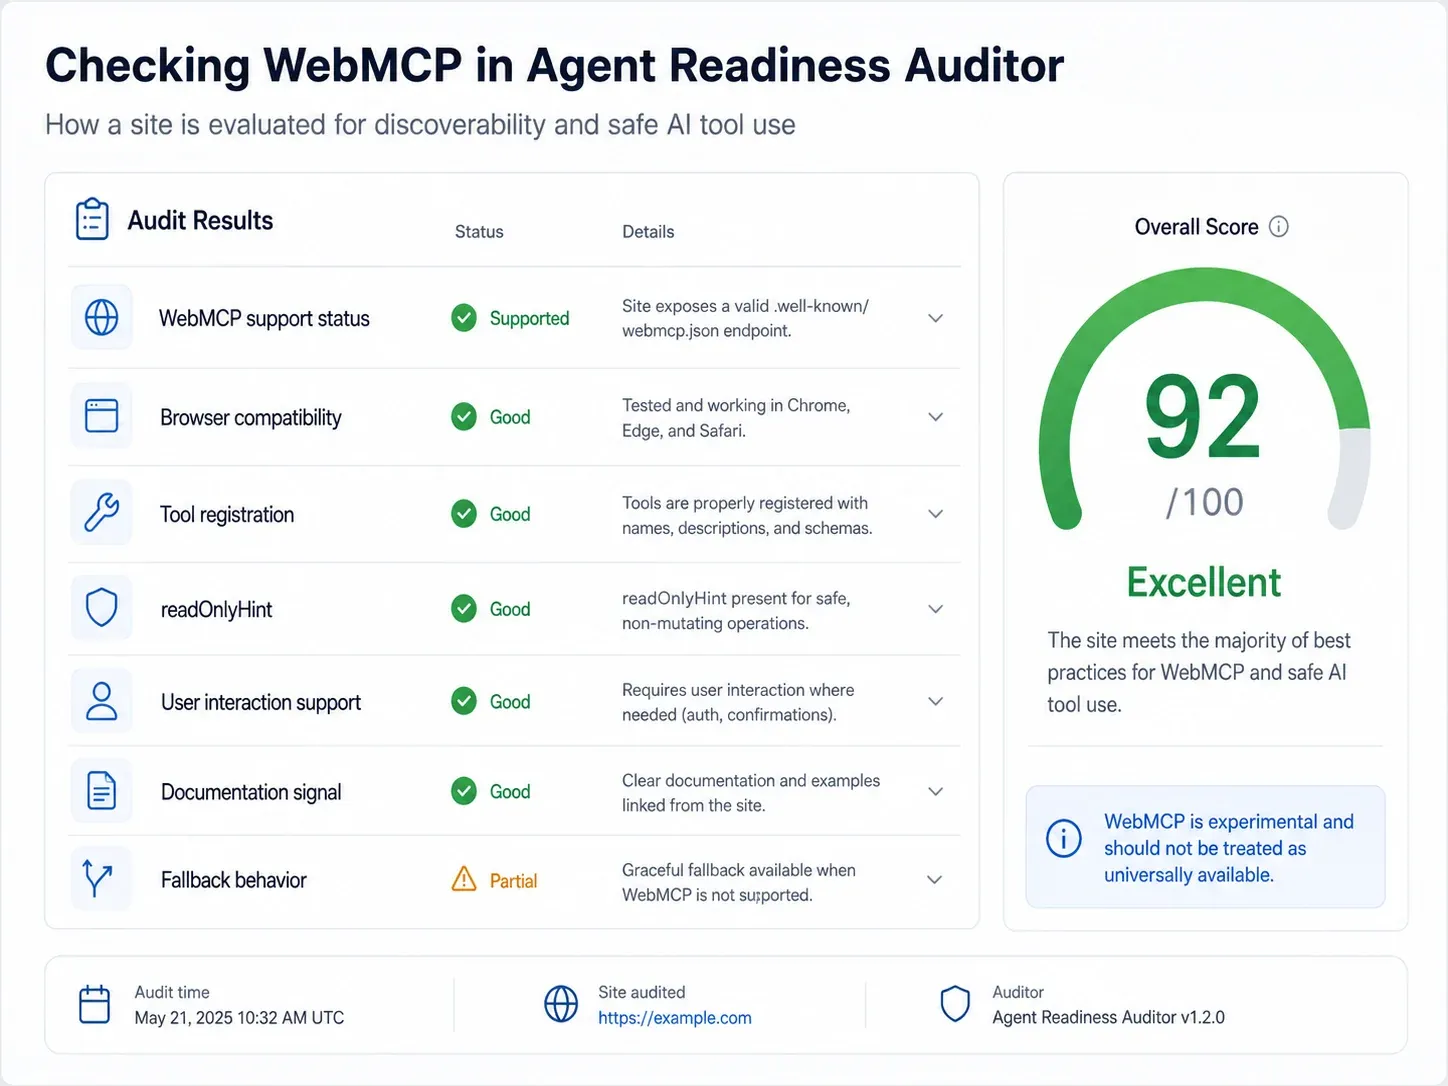
First, verify functionally in a browser environment that supports the experimental feature: make sure the tool registers, the schema is correct, execution returns the expected result and failure paths are explicit.
Second, use Lighthouse. Chrome now has a Registered WebMCP tools audit that lists tools registered through the declarative or imperative APIs. An empty result means Lighthouse did not observe a valid WebMCP tool on the page.
Third, run conversational evals. Express the same user goal in several ways and check whether the agent selects the intended tool, extracts the correct parameters and refuses or asks for clarification in invalid states.
Fourth, add production telemetry. Track tool exposure, start, success, error and meaningful post-action outcomes rather than looking only at page views.
WebMCP and llms.txt solve different problems
llms.txt v2 is about helping agents discover and understand content. WebMCP is about exposing structured actions once an agent is on an actionable page. One is primarily discovery; the other is operation. For the boundary between WebMCP and a standalone MCP Server, continue with the MCP protocol guide.
A more complete readiness stack looks like this:
robots / sitemap / canonical
        ->
llms.txt + Markdown discovery
        ->
clear page semantics
        ->
WebMCP tools where actions are useful
        ->
authorization / confirmation / telemetry
The XBSTACK Agent Readiness Auditor evaluates these layers separately. A site is not automatically agent-ready because it has /llms.txt, and registering one WebMCP tool does not make the whole site ready either.
Recommendation
For a first WebMCP experiment, choose one low-risk, read-only, easily verifiable task such as documentation search, product lookup or a readiness scan. Prove the schema, tool selection, error states and telemetry before expanding into write operations.
WebMCP is worth preparing for, but the technology is still experimental. Accurate version boundaries and fallbacks are more valuable than registering dozens of tools just to claim the site is “AI ready.”
Continue from protocol details to production MCP governance
The MCP hub connects protocol fundamentals, transports, authentication, security, JSON-RPC debugging and production deployment without splitting the search intent across isolated guides.
Next step: move MCP toward production
Full decision path →Continue from protocol behavior into transport, authorization, security, and operational boundaries.

DISCUSSION
Questions, verification and corrections
Sign in to comment. Every new comment is reviewed before publication; while pending, it is visible only to you and the administrator.